Do you like craft projects? Many people will respond positively! Popsicle sticks can be an endless source of inspiration for wonderful crafts that are used to decorate our homes, play games, etc. Look at these popsicle stick crafts for adults and try some of the ideas this weekend!
Ads
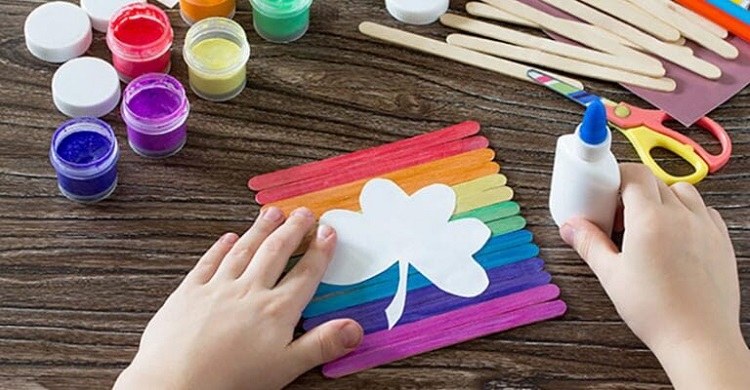
Why popsicle stick? On the first place – this is an affordable material! Popsicle sticks are made of wood which is the most used and invaluable building material. Craft sticks are safe, they are easily glued together, they can be painted and decorated with fabric, beads, sequins, buttons, etc. You can use popsicle sticks to make festive home decorations, markers for plants, miniature constructions, even toys for your children!
Popsicle Stick Crafts for Adults – DIY Planters
Ads
Materials:
- A pack of popsicle sticks
- White acrylic paint or chalk paint
- Craft glue
- Cylindrical glass or can
- Some raffia
Instructions:
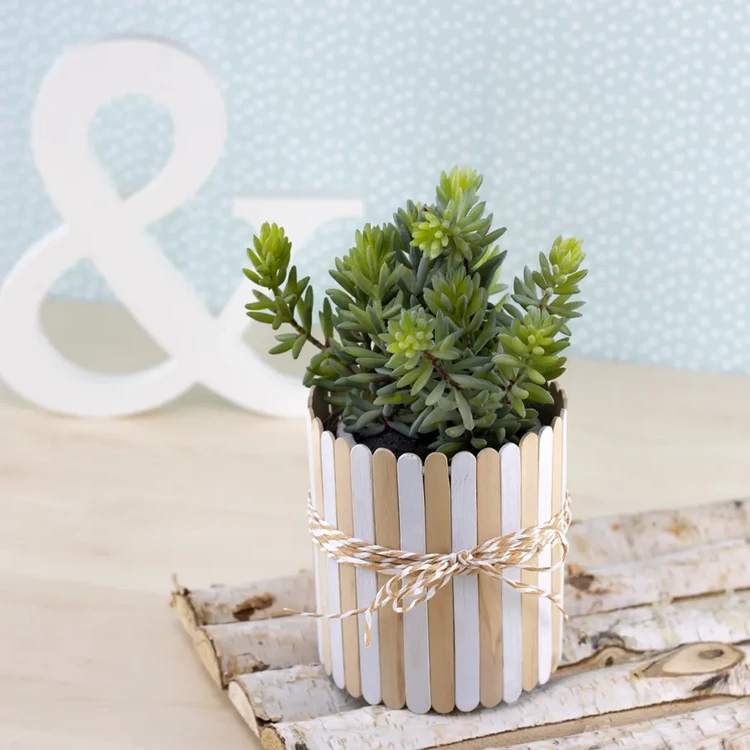
Paint half of the popsicle sticks with white paint.
Let it dry and then alternately stick white and natural-colored craft sticks all around your container. Don’t use too much glue so it doesn’t push through.
Wrap the raffia ribbon around the planter several times and tie it with a bow.
DIY Popsicle Stick Wall Shelf
Materials:
- 100 Popsicle sticks
- Tacky glue
- Stain
- Paintbrush
Instructions:
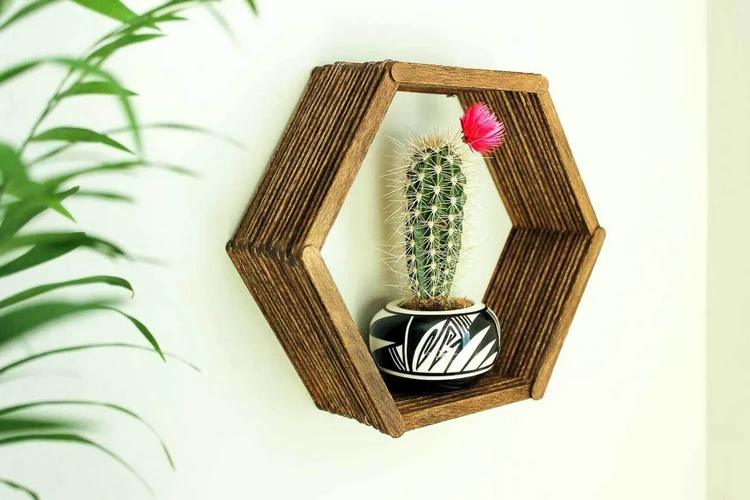
Add a drop of glue to both ends of three popsicle sticks and lay them as shown on the photo.
Layer three more sticks to complete the hexagon shape.
Continue glueing and layering the sticks until your hexagon shelf is a deep as you’d like it to be.
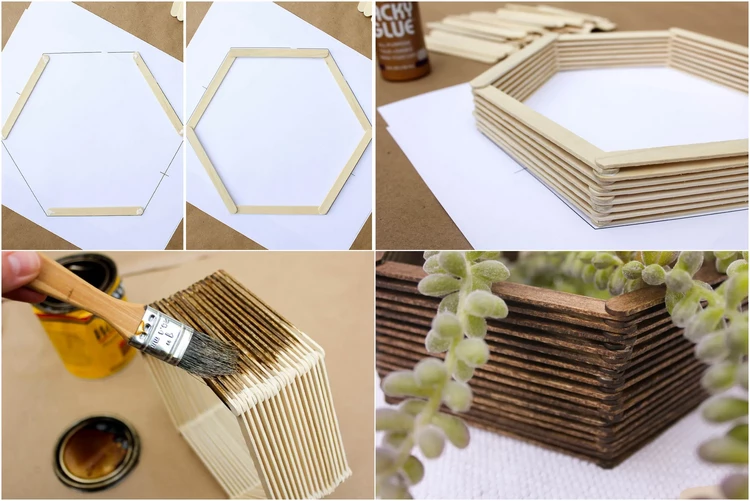
Allow the glue to dry.
Stain your wall shelf, making sure to get stain in between all of the popsicle sticks.
Optionally, glue a picture hanger to your shelf.
DIY Table Decorations – Place Cards
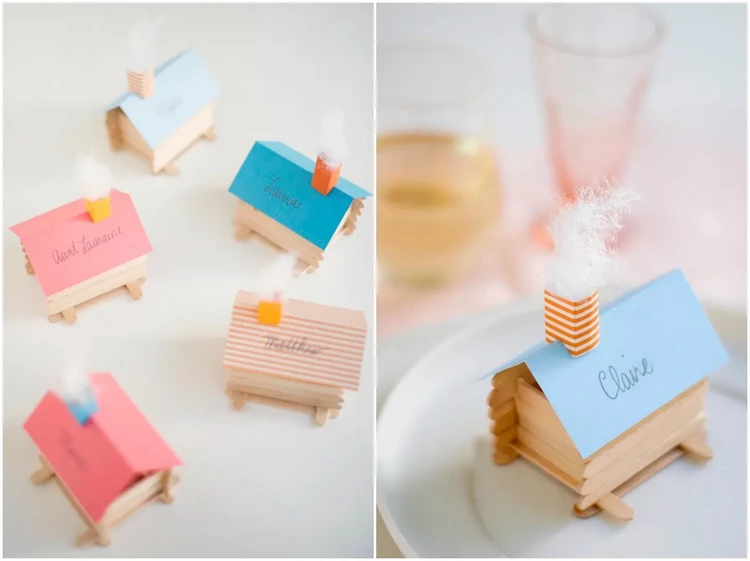
Materials:
- Mini craft sticks
- Paper
- Craft glue
- Scissors
- Ruler
- Pencil
- Stuffing or cotton balls
Instructions:
Take two mini Popsicle sticks and place them 2 inches/5 cm apart. Glue two more sticks across the first two.
With a pencil, mark the midpoint of each intersection of sticks. This will be the length of your side walls.
Cut one stick to fit inside the pencil marks.
Using the short, cut stick as a guide, cut the ends off eight sticks.
Apply a line of glue to the longer sides, and attach two sticks along their skinny side.
Insert and glue two smaller ‘side’ sticks, along their skinny side.
Continue until you have 4 short sides stacked up, and 5 long sides stacked up. Let dry.
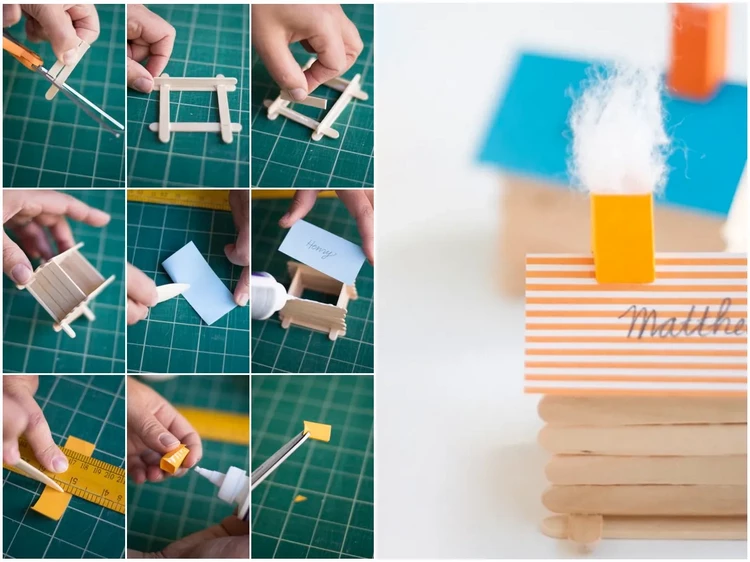
Cut a piece of cardstock. Fold in half and crease firmly.
Write your guests name across one side. Gently glue to top of cabin.
Take a strip of paper and crease it so that you have 5 segments.
Fold the strip of paper into a chimney shape and secure with glue. Let dry.
Cut a tiny triangle into one side of the bottom of the chimney.
Cut a tiny matching triangle into the opposite side of the bottom of the chimney.
Place a line of glue along the bottom edge of the chimney and attach to roof.
Using a pencil to poke it in, add a small bit of stuffing or ripped cotton ball coming out of the chimney.
Popsicle Stick Crafts for Adults – How to Make Bracelets
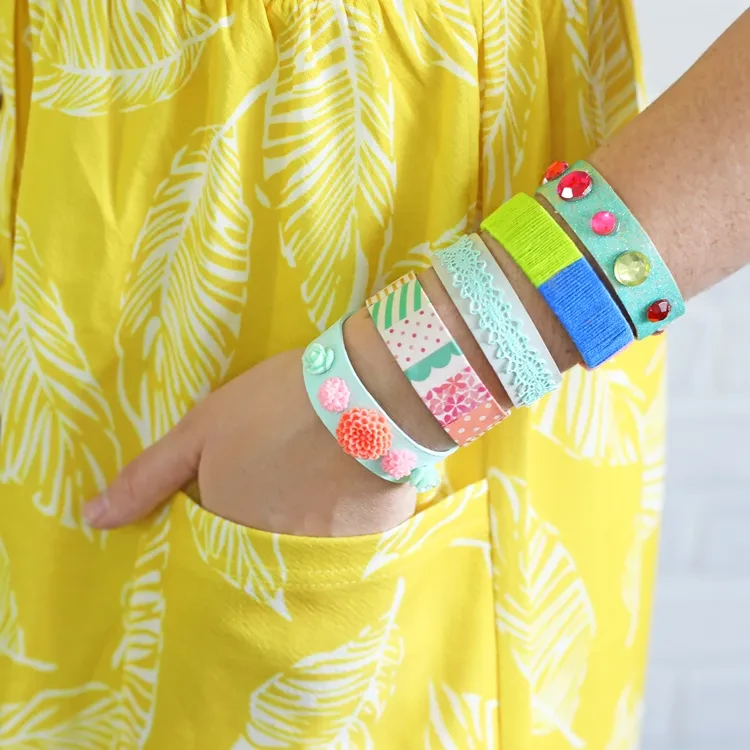
Materials:
- Jumbo Wooden Craft Sticks
- Sturdy Jar
- Hot Water
- Embellishments: washi tape, glitter, embroidery thread, rhinestones, buttons, paint, stickers, lace, etc.
Instructions:
Soak popsicle sticks in hot water for at least 30 minutes until the wood softens and becomes pliable.
Gently bend the popsicle sticks between your fingers. If the wood is still too stiff to manipulate, soak the sticks in hot water for 15 more minutes.
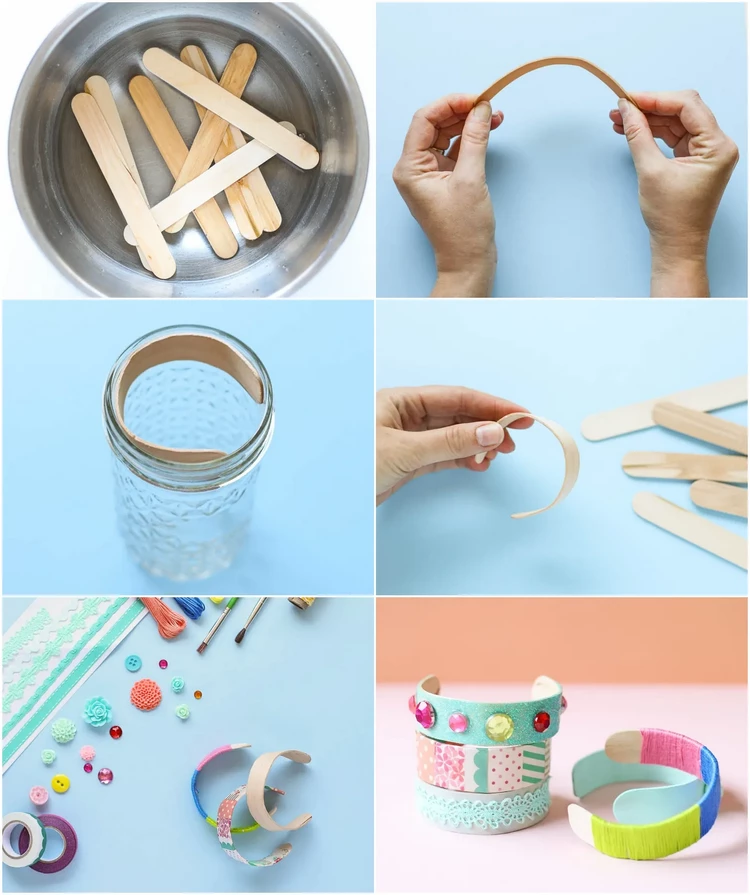
Carefully bend the stick to fit inside of a sturdy straight-sided cup or jar.
Let the sticks dry overnight.
Decorate your wooden popsicle stick bracelets as you wish. Optionally, you can punch small holes into the ends of each stick and add a tie to better keep the bracelets on.
DIY Popsicle Sticks Earring Holder
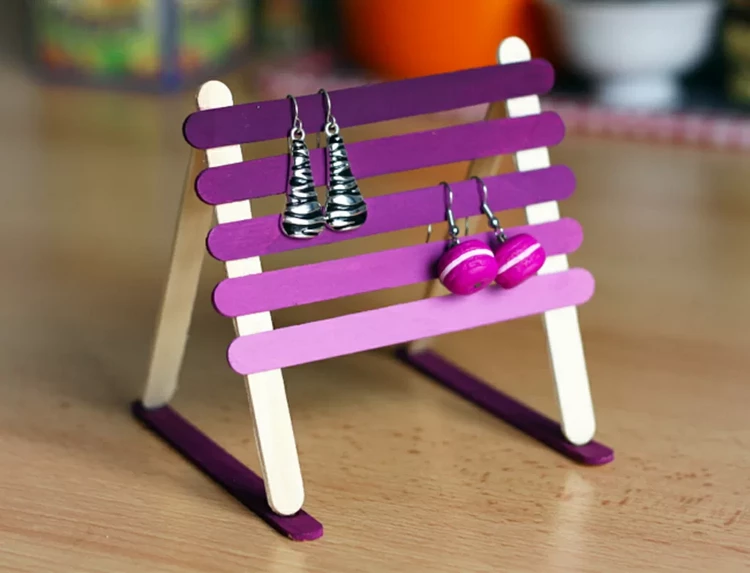
Materials:
- Acrylic or chalk paint of your choice
- Paint brush
- Strong glue
Directions:
Paint the sticks.
Glue 4, 5 or even 6 sticks, depending on the number of earrings you want to hang horizontally between two other vertical sticks.
Then make a triangle on each side of the “grid” with two more ice cream sticks. A dot of strong glue is enough to stick, it will however be necessary to hold the sticks firmly.
Be sure to let it dry for several hours before hanging your earrings.


:max_bytes(150000):strip_icc()/house-cleaning-schedule-for-every-day-3129149-06-b23eacd9ef3a41fc833c68e095b34c72.jpg)


More Stories
Easy Bedroom Decorating Ideas
Changing Moods in Home Decorating
Irresistible Home Decor For Music Lovers